Wednesday, July 28, 2010

Banana Muffins

My Grammie was a nurse. That is, she was a nurse when she wasn't at home with her three kids being Dr. Mom. She worked as a nurse both before her children and then after they were in school. I figure she must have been a good nurse as my mother often reminds me she even worked with the famous Dr. Penfield. That's right, the fellow from the Canadian history moments who helped map the human brain. (Dr. Penfield, I smell burnt toast!) As a child, I remember how sharp her mind was. She could keep on top of a sea of grandchildren and never let one of us get out of line. I guess that was why I found it so hard to accept that she had alzheimer's disease. She went from a brilliant women to a confused woman trying to put her folded laundry in her oven. Alzheimer's seemed to me to change her whole personality. She forgot her whole self and became a sort of sweet generic granny-type who was nothing less than bubbly. My Grammie was generally a caring but serious woman. This whole process upset me. When I was finally old enough to confront her for various issues that stalked my relationship with her, she was gone. She slipped away and this person who looked like her but had simply forgotten the last 40 years of her life walked through our door one Christmas. She found it confusing to see her grandchildren, because she knew that she should recognise us, but simply didn't. She had it easier with me, because I look quite similar to my mother and my Aunt. Every time Grammie saw me she'd inevitably call me by their names. If my Mom and I were standing together, she'd get very uncomfortable for a moment, then settled on calling me by my Aunt's name, if anything. It was so frustrating, because we had only recently gone through the same thing with my paternal grandfather. I had for the last few years of his life been called by my grandmother's, who passed away before I was in school, name. I was in high school when he passed away, and now in university I wasn't sure I was prepared to deal with all the drama all over again, least of all with a woman who I wanted so badly to call out on so many things. I wanted a chance to heal my relationship with her after years of bitterness. Instead, I was faced with this charming woman, who oddly enough reminded me of the sweet little grandmother I had always wanted. On the day before she passed away, she had a day of complete clarity. She remembered everything, and all of us, although she was in many ways too weak to say what she needed to stay. Instead, she layed patiently as each of us spoke to her our final words. When it was my turn, I didn't have the heart to call her to task for years of misunderstandings. All I could do was give her one last hug and say that I would miss her and that I loved her. In the end, that provided more catharsis than dragging out all my issues ever could have. Now, here I am a few years later trying to recapture some fond memories of her. Some days it's like chasing butterflies, but other days it's much easier. There is so much of those good memories tucked away between the lines of her favourite recipes, it's not hard to find them over a bite of her chili, some bread, or even a simple muffin made from scratch.
In honour of my Grammie as a nurse, I chose a recipe from her cookbook on a typed out page titled "Nutrition Week". I was nervous that I would find something granola and flavourless. However, as I had an abundance of bananas, I was intrigued by the Banana Muffins first, and oh boy were they great. Now, I'm not so health-conscious as my Nurse grandmother, so I fouled up the recipe a little and added some chocolate chips. To counteract that, though, I also added some flax seed. I reduced my guilt, but to be honest I wasn't that guilty to start with. These banana muffins are more of a treat than a breakfast food. They're easy to make, and even easier to eat. I hope you enjoy them!

2 cups flour
1/2 cup white sugar
2 teaspoons baking powder
1/2 teaspoon baking soda
1/2 teaspoon salt
1/4 tsp cinnamon or nutmeg
1 medium banana (mashed)
1 egg
1/2 cup milk
1/3 cup vegetable oil

Preheat oven to 375 degrees. In a large mixing bowl, combine all dry ingredients. Sift them together until they're evenly blended. I find the dark cinnamon or nutmeg is a great hint of how well mixed it is. Make a little well in the middle of your flour mix, and add the remaining ingredients. Stir them until the flour mixture is evenly moistened, but don't overmix it as this will make your muffins heavy. If you want to add anything (nuts, chocolate chips...) now is the time to do it. I put in 1/2 bag of chocolate chips and folded them in carefully, trying to not overstir the batter. I might also recommend to keep the whole mix nice and moist you might want to add another mashed banana to offset any other additives.

Spoon your batter into a greased muffin pan, filling each cup 2/3 full. Bake 15-20 minutes or until they're golden brown. Pop them out onto a wire cooling rack and eat! They're great on their own or with a little dab of butter. I'm salivating just thinking about it. Time to go grab another one!

Enjoy your baking!


Tuesday, July 20, 2010

Hummingbird Cake

My grandparents lived (and in my Grampie's case still live) in a beautiful big house in a village in the country. It's the house where my grandfather was born, and is seeped in memories and old traditions. Since inheriting it, my Grampie has done lots of renovations and added much to the house, usually just in time for a special occasion like a wedding or the birth of a child. There is one feature I always look for as we drive down the dusty road past the homes of my Great-Aunts and Great-Uncles to my grandparents home: a beautiful front door with a stained-glass window. We weren't allowed to actually go in or out that door, but I loved sitting on the stairs looking at it. The picture molded out of the different panes of glass is one of a beautiful hummingbird perched over a flower. Looking back it doesn't surprise me that that's the image chosen for the door. My grandparents used to set fistfuls of seeds on the deck railing outside their kitchen window so they could watch the birds and hear their joyful songs as they ate their breakfast. Out front of the window over the kitchen sink and the diningroom window were several hummingbird feeders. I remember her quietly gesturing for me to come to the window to point out these beautiful birds while she was doing the dishes. We would go to the diningroom window (it was lower so I could see out) and watch, careful not to distract the hummingbirds.

When I saw the name of this recipe, it brought a big smile to my face. I was in the mood for a bit of cake, but wasn't in the mood for a boring box cake. I was doubly surprised that this cake took less time to mix together than the box cake. As an added bonus, it needed some ripe bananas too. Having recently been given an abundance of bananas, I was more than happy to use a few this way. When I bit into my first bite of cake last night, it reminded me a lot of carrotcake in weight, but with a fruity twist. I used Cool Whip with a bit of crushed pineapple mixed in for the icing, but I've included the original cream cheese icing recipe my Grammie suggested. The cream cheese would have made it even more like a carrot cake, which would have been great in retrospect. I did, however, love the Cool Whip because it made it so light and fresh in this heat. Now, on to the recipe!

3 cups flour
2 cups sugar
1 teaspoon baking soda
1 teaspoon salt
1 teaspoon cinnamon (oh yes, just wait until you smell this baking!)
1 cup walnuts (optional)
1 1/4 cups vegetable oil
1 1/2 teaspoons vanilla
3 eggs
1 8 oz can of crushed pineapple (I got an 19 oz can and saved half to mix with the cool whip)
1 cup crushed bananas

Sift dry ingredients together. Stir in wet ingredients with a spoon. Don't beat them in as it will overmix the fruits and leave you with a heavy cake. Poor into a tube pan (I'm assuming she means a bundt pan, but I actually used two buttered and floured round pans and made a layered cake). Bake for 1 hour and 10 minutes in a 350 degree oven.

Cream Cheese Icing

1 40 gram pack of pineapple cream cheese (or you can buy regular and mix in the leftover pineapple from your can, be sure to drain the liquid of the 2nd half of the can though)
1/4 cup margarine
1 teaspoon vanilla
1/2 lbs icing sugar or enough to make proper icing consistency

Mix in order given. Let your cake cool completely on wire rack before icing or it will slide down the cake.


Here's a slice of the finished product. It's a dark but very delicious cake! I can't wait to have another piece tonight.

Enjoy your baking!

Lemon Poppyseed Squares

First, a confession. This recipe was actually for Lemon Coconut Squares, but I don't like shredded coconut that much, whereas I love anything lemon poppyseed. I'll put the place to alternate with coconut for those of you who like it.

I liked this recipe from the second I set eyes on it. We were having a dinner party on Friday with a pair of delightful newlyweds, and I wanted to make something light and easy. I remember from being a newlywed that when you're first married, everyone wants to see you, to take that time they couldn't at your wedding to talk to you about the joys of married life and to congratulate you in person. With that in mind, I didn't want to make a big heavy dessert but something light and delicious to end an simple meal. After reading the recipe in my Grammie's cookbook, I didn't recognise it, but after taking my first bite the lemon brought me back to her kitchen again. I remember her making them up for a church social or a bake sale. I shouldn't say I remember that, what I DO remember is her letting me have a bite of one that didn't cut nicely enough. I found this sweet and funny because the reason I was taste-testing that exact piece in my own kitchen so many years later was because it didn't look pretty enough on the plate. As the old saying goes, the more things change, the more they stay the same. That little moment reminded me so strongly of the innocence of youth and the love and indulgence my Grammie had for me when I was a little girl. I am her only granddaughter, and the inheritor of so much more than her engagement ring, but also of the desire to share my love with friends and family through a handful of well-honed recipes. My relationship with my Grammie was anything but perfect, so I'm happy to hold on to the memories of simple times in her beautiful kitchen, watching her effortlessly whip up another treat.

Now, the recipe!

1 cup flour
1/4 cup icing sugar
1/2 cup margarine
2 tablespoons poppy seed (or 3/4 cup shredded coconut)
2 eggs
1/2 teaspoon baking power
2 tablespoons lemon juice (I actually put 3 tablespoons to pump up the flavour)

Mix flour, icing sugar and margine together thoroughly until it becomes soft and crumbly. Press crumb mixture in the bottom of a 8 inch square pan. Bake at 350 degrees for 15 to 20 minutes to set the bottom. If you're using coconut, once that's done sprinkle the set base with coconut.

Beat remaining ingredients together and pour over top of set crust. Bake 20 to 30 minutes longer. You'll know it's done when a sharp knife comes out of the top relatively clean. Let cool, cut and serve. Eat any pieces you think aren't pretty enough to share.


Enjoy your baking!

Banana Bread

We had some dear friends over for dinner (wait until you see what I made for dessert on my next post!) and they brought over a big bag full of bananas. They were on sale at the local fruit monger, probably because some of them were getting a little over-ripe. After puzzling for a day as to what to do with them, I took my friend's suggestion and decided I should try banana bread. I scoured my Grammie's cookbook and found this recipe I thought I'd try. I got it right on the first try with very little effort, so I knew it would be a great one to share. I'm also sharing it now because I know those same friends are living in banana heaven too, but they don't have 2 hungry toddlers anxious to eat them up. So, dear you friend, you know who you are, this one's for you!


1/2 cup butter at room temperature
1 cup sugar
2 beaten eggs
2 1/2 cups flour
1 teaspoon baking soda
1 tsp baking powder
1 cup bananas mashed with 1/2 cup cold water
1 cup chopped nuts (optional)

Cream together butter, sugar and eggs. I actually did this with my little hand-mixer because my butter wasn't soft enough to cream properly. Normally I'd just do it by hand with my trusty wooden spoon. Sift together remaining dry ingredients in a separate bowl. Alternate adding flour mixture and banana mix in three parts each to butter mixture, stirring at each step smoothly mixed. Bake in 2 greased loaf pans for about an hour in a 350 degree oven. Let cool on wire racks. Once they're cool, I find they taste perfect at room temperature or heated up in the microwave with a bit of butter spread on it. Yum!

Enjoy your baking!

Thursday, July 15, 2010

Tourtiere (French Meat Pie)

Here's another pie for you to try, but this time it's a main course! Tourtiere is one of my favourite meals, and not just because it's easy to make. This is a Christmas essential around my parents' house, and now it's part of my family's Christmas tradition too. I like to make it as a gift for family, because once you've tasted this recipe with all its rich flavours, the store brand meat pies will seem dull. I like tourtiere so much, that I like to make it periodically throughout the year. We have it more often that Christmas, but not so frequently that it loses its novelty. This is a great meal that freezes and reheats very well. You can make it weeks ahead and pop it in the freezer!
Growing up I always assumed that this family favourite came from my father's side of the family. My paternal grandfather was from Québec, and tourtiere is known as a French Canadian dish. However, while sifting through my Grammie's cookbook, I discovered this recipe tucked in amongst other family favourites (not so far from the chili recipe). It's right in the middle of her supper recipes, not relegated to another section called "Foreign Foods" which includes some very Canadian takes on Chinese (did you know anything you add Sweet and Sour sauce to becomes automatically Chinese?), Hawaiian (and pineapple makes it Hawaiian!) and Italian food (so long as it has some kind of tomato sauce...). I guess this meat and potatoes pie was right up her alley. A great mix between simmer and serve cooking with a bit of baking to finish it all up. I must admit, that's what appeals to me about this recipe, even though the daunting pie crust is still needed. Pie crusts are surely not for the faint of heart. They are my absolute menace in the kitchen. That's probably why most of my desserts end in 'crumble' or 'crisp'. In an effort to improve my skills through this process, I find myself purposely seeking out pie recipes of all varieties, and I must say, it has been worth it. The crust I made for this delicious creation was certainly the best I've ever made. Hopefully you'll have the same luck when you try this out!
Here's the recipe:
1 lb ground meat (pork, beef, lamb, rabbit, whatever you like!)
1 large clove of garlic
1 large onion
1/2 cup water
1/2 tsp salt
1/2 tsp thyme
1/2 tsp dry mustard
1/4 tsp pepper
1/2 tsp sage
1/2 tsp ground cloves1 large potato, boiled and mashed
1 pie pastry
1 egg yolk, beaten

Put water, garlic and onion in blender and blend until smooth. Put this mix with your meat and all seasonings for 1 hour. Mix in mashed potato and let cool. Fill crust of your pie just like a fruit pie, cover with pie crust. Slit your crust and brush it with your beaten egg yolk. If you have some spare dough from your pie crust, you can save it to make mini-pies, or you can decorate the top of your pie. Be careful not to cover the slits you put in! Bake in a 400 degree over for 45 minutes.
As a side note, I've used this same recipe and added frozen vegetable to the mix and topped it with mashed potatoes instead of pie crust. Add a little gravy and you'll have a spicy Shepherd's pie!
Enjoy your cooking!

Tuesday, July 13, 2010

Rhubarb Cream Pie

Today's blog is about most Martitimers favourite pie ingredient (except apple? Don't we ALL love a good apple pie?). I didn't realise it as a child, but I think rhubarb must be one of the most prolific fruits (is it even a fruit?) available here. You can grow quite a lot in one summer and, with the right amount of sugar or other fruits, it's a delicious part of any summer pie. I think my grandparents must have grown it in their garden, because every summer when we went down for a visit there was always some kind of rhubarb pie. I remember in particular Rhubarb-Strawberry pie always being on hand for dessert. No Thanksgiving or even Christmas was complete without an assortment of pies either. Apple, Pumpkin, Lemon Meringue, or of course the ever-present Rhubarb with a touch of ice-cream or cream. It was more legend than fact to me as I only ever had it in the country. It isn't as easy to buy here in the city. So, unless like me you have family who grow it in their backyard, it's reserved for special occasions. My in-laws have one medium-sized plant that seems to provide endless batches of the stalky reddish bush. Ever since my husband and I have been married I've enjoyed even more variations on the theme of rhubarb from my mother-in-law's kitchen, as well as several ziploc bags crammed with pre-washed and pre-cut rhubarb fresh to try my own recipes on. I had to take a hiatus from rhubarb while pregnant, so now that our third child is born I've been looking for new recipes to use the stock-pile of frozen rhubarb inhabiting my freezer these past 9 months. Luckily, my Grammie also had a great fondness for rhubarb, and I've re-discovered some recipes that are old favourites and some that are sure to be new ones too. I found a particularly adorable one that involves those cute little cinnamon heart candies. That one has certainly made the cut of must-try recipes. The one I chose for today, though, is for a type of pie I've never made, so I was intrigued. A simple and quick Rhubarb Cream Pie! My only advice after having baked this delicious treat is that if you're using frozen rhubarb is to be sure you let it defrost before using it as the condensation will make your filling too watery.
Here's a picture of everything you'll need. Not so menacing, right?
Ingredients:
1 1/2 cups sugar
1/4 cup flour
3/4 tsp nutmeg
3 slightly beaten eggs
4 cups rhubarb (cut in 1 in pieces)
1 plain pastry
2 tbps butter
Firstly, sift together your sugar, flour and nutmeg in a smaller bowl. In another bowl, beat your three eggs lightly. They don't need to be stiff, just break the yolks and give them a few goods turns with a whisk. Add your flour mix to the eggs and then mix them together with your whisk (or a hand-mixer) until smooth. Add your rhubarb and stir them in until all the pieces are evenly coated. Put your pie crust in a 9 in pie plate and then pour your filling in. Dot the top of this with butter and then top with a lattice. Bake in a 400 degree oven for 50-60 minutes.
Just a side note, I do realise my lattice work is atrocious. I made my own pie crust and didn't save enough for the top, so I just used what I had as best as a could. Here's the finished product! We topped ours with whipped cream when we ate it and, despite being a little watery from the condensation when the rhubarb defrosted, it was delicious. The light taste of the cream was a great compliment to the tart rhubarb!
Enjoy your baking!


Saturday, July 10, 2010

7-Up Cake

It's been a few days so I thought I'd put up a fun little recipe I found in my Grammie's cookbook. I've never made cake from scratch, so when I saw this little number I couldn't resist. It was so easy I couldn't believe it! All the ingredients are pretty common too. I think it's funny that my Grammie decided to include this recipe in her cookbook. Using pop as an ingredient is funny and clever, and surprisingly effective. I hope you all enjoy the recipe!

Ingredients:
3 cups white sugar
1 1/2 cups margarine
5 eggs
3 cups flour
2 tsp lemon extract
3/4 cup 7-Up

Cream sugar and margarine. Add eggs one at a time, beating them well. Fold in the extract and flour gradually. Lastly, add the 7-Up. Have fun folding it in at the bubbles made me giggly like a child. The batter will be thick but uniform once you've carefully mixed in the 7-Up. Bake in a bunt cake pan, or even two bread pans. Cook for 1 hour or more until a toothpick comes out clean. Let cool in pan.

If you choose to ice yours, I would suggest making a lemon-flavoured icing to kick it up a notch. I would do that by simply adding 1 tsp of lemon extract to whatever icing you like. I'd say folding some into some whipping cream and then using that as a frosting would be great. I made mine in two bread pans so I served it like a loaf.

Another fun idea would be to switch up the pop to get different flavours. You could switch it to cream soda and then stir in some cherries! With all the new flavours of pop out there, your choices are unlimited. My only advice would be to make sure you have something extra to boost the flavour, either in your cake or in the icing as just the pop without the flavouring comes out like just a plain pound cake with a lingering taste of something!
Enjoy your baking!


Tuesday, July 6, 2010

Mum's Molasses Brown Bread

While it may seem I'm copping out twice in a row by posting other people's recipes, this recipe is actually in my Grammie's cookbook. My Mum, who is an AMAZING baker, has the best brown bread recipe I've ever made or tasted. Hands down. Over the past few years I've shared it with many friends and members of my husband's family. Even the most novice bread-maker will find this recipe manageable and easy to follow. It was the first bread I ever made, and unlike my first try with white bread, it was a complete success. I think we ate an entire loaf in a day. What made me choose to share it here even though I've already passed it along to many people, is the fact that I can tell my Grammie really liked it too. There are several copies of the recipe in her cookbook, one in Grammie's handwriting, and two in my Mum's. The recipe is always the same, and the one my Grammie wrote down has my mother's name proudly written at the top. The second copy I found is in my mother's neat handwriting, familiar to me from her signature on permission slips and birthday cards. The third copy I found looked like her handwriting, but different from what I remember. It's youthful, unsure, and not so different from my own. It's fascinating to me that as she changed, this recipe stayed the same. I think I'm like that too. I know I've changed. At first I was a child, then I moved out, became a wife, and now a mother. Still, through all the changes in my life, inside I'm still the same person, learning new talents but not forgetting my old ones. As I'm sure my parents will tell you if you ask, I was not always an accomplished baker or cook. I lacked confidence and foresight. I had more than one incident in which I almost burned my parents house down by means of the microwave. While it may be a funny story to them, to me it was a learning experience. I learned about patience, attentiveness, and in the long run to trust my instincts. Now, here I am today using those hard-won skills for my family. It always seemed to me my Mum and Grammie came by their talent for baking genetically. There are generations of women in my family who had no fears in the kitchen. Somehow though, looking at my mother's uncertain handwriting as she shared her recipe with her own mother, I realised maybe I was wrong. We are only who we are because of who we were. We are women because once upon a time we were princesses playing tea party under our mother's watchful eyes. Or in my mother's case, my Mum is a confident baker because once upon a time her mother like a recipe enough that she included it amongst her favourites in her flour-covered cookbook. I'm grateful for this realisation because I appreciate something so simple as a bread recipe more today because it tells me something of who my mother and grandmother were yesterday. Maybe someday I'll have a recipe to share with you, Mum, that you can proudly write my name at the top of. Until then, I'll keep learning from the written history of the women of our family. A few old binders crammed with the memories of a woman who left us too soon but who helped give you and now me confidence to share old things and try new things.

Now, on to the recipe! Here's a shot of everything you'll need. Just add water! Doesn't look so menacing, does it? And no, you don't have to buy the jumbo jug of molasses. I just REALLY like this bread recipe so it behooves me to keep molasses in bulk.

Mix and let cool to lukewarm:

4 cups boiling water
2 cups quick rolled oats
1 1/2 cups golden molasses (I use dark with great results)
1/2 cup margarine

If you stir this mix frequently, I think you'll find it's cool in 10 minutes. As such, you'll want to get your yeast ready pretty much as soon as you've combined the oat mixture.

Mix and let stand for 10 minutes:

2 1/2 tablespoons quick rise dry yeast
1 tablespoon sugar
1 cup lukewarm water

Once the 10 minutes has elapsed, combine the two mixtures in a large bowl. Mix in 12 to 14 cups of flour. Just like the white bread, I recommend you mix in the flour gradually so your mix isn't overwhelmed. Turn mix out onto a floured surface and knead well. You will want the dough to be a little sticky. A great feature of this recipe is that you don't have to double rise the dough in a bowl. Cut the dough into four, form the quarters into loaves and put into greased bread pans. Let your loaves rise to double covered with a dry cloth towel. Bake in a 350 degree oven for 30 to 35 minutes. Stay close to the oven and follow your nose because the bottom burns very easily. You'll know it's ready when the top of your bread is a beautiful golden brown. Let the loaves cool in the pans for 20 minutes, then cool them the rest of the way on wire racks. Or, if you don't want to let them cool, take a bread knife and dig in. Much like the white bread, this bread freezes very well. Just pop it into clean bread bags once it's cooled and put it right in your freezer. When you're ready for it, take it out and let it defrost on your counter. This bread is SO good it doesn't need any spreads, but it's very good as a grilled cheese sandwhich. I'm salivating just thinking of it. I'd better wrap this up so I can get downstairs and get some while it's fresh...

This one's for you Mum! Enjoy your baking!


Monday, July 5, 2010

Picky Potato Salad

I've learned a few things about my Grammie by sifting through her cookbooks this past week. While there are many handwritten recipes in her book, most of them are copied down from family and friends. Besides that though there are pages upon pages of calendar, magazine and flyer clippings with recipes. If she's tried them, she usually puts her stamp of approval (good, very good!) on the top right corner of the page. Sometimes there are little notes written all over the paper with improvements on the original recipe. I have unwittingly been doing the same thing for years with a little cookbook my mother assembled for me one year. This blog is really my way of sharing some of those favourite recipes with my own little improvements. In honour of Grammie's willingness to try other people's favourite recipes, I'm posting a family favourite from my husband's parents. I don't know for sure if today's recipe is in her cookbook, but I wouldn't be surprised to find it there. This recipe is from Better Homes and Gardens Magazine originally. After looking through Grammie's cookbook, I doubt that there's a recipe from the last 50 years that she didn't clip and put in her binder. This one, I assure you, is worth trying and sharing. Perfect for BBQs, potlucks, cold suppers, or just because. Once you try this recipe for potato salad, you'll never want to buy the bright green stuff from the grocery store again.

Just so you know, the actual recipe title is Perfect Potato Salad, but I call it Picky Potato salad because I'm picky and have a tendancy to omit a lot of ingredients. haha. The only parts you absolutely can't omit are the condiments and spices. Oh, and of course the potatoes!

3 cups cooked potatoes (cut in chunks and allowed to cool)
1 tsp sugar
1/4 cup chopped onion (guess what? I omitted them!)
1/4 cup sweet relish
1/2 tsp salt
3/4 cup mayonnaise
2 hard-cooked eggs (I omitted these this time, but more for time constraint, they're great!)
1 tsp vinegar
1/2 cup sliced celery (omitted, but only because I didn't have them handy, also a nice touch)
1 1/2 tsp celery seed
1 tsp mustard

Sprinkle potatoes with sugar and vinegar. Add all remaining ingredients and garnish with slices of egg if desired. Serve cold.

Enjoy your cooking!

Friday, July 2, 2010

Chili con Carne (or... chili with meat)

I doubt I will be able to keep up this pace for long, but I figured that since I was planning on making up some of my favourite recipes, I might as well share them with you. Now, most of you may not think chili is a summer dish, but I think chili is an any time dish. I made it for the first time today, but it has been a favourite of mine for years. My Mum has perfected the art of making it in her slow-cooker, but I made it right on my stove-top tonight. Easy to do either way.

I realised as I was scouring my Grammie's cookbooks this week that this chili recipe must have been a favourite of hers over the years. I think I saw it copies in her tight scrawling handwriting at least three times. I'm pretty sure it was always the same recipe with only minor variations. Even my version has some variations on her original. I didn't have all the ingredients, so I just omitted some and added others. I can see why she liked it enough to write it in so many times. When she was raising up her family, she had my grandfather and three kids to feed. Depending on how you spice it, you can serve this dish up to everyone in the family (although the smaller ones may make a bit of a mess of it) all out of one pot. I remember when I was a kid my Mum used to add sour cream for those of us who couldn't handle the spice on days when she was a little heavy-handed on the chili peppers. Tonight, I made it for just my husband and I, so we cranked it up a notch with far more spice than the recipe called for. I must say, no regrets. I downed a few glasses of water to sooth the fire in my mouth, but I did it with a smile on my face. I think maybe I should have raised a glass to you Grammie, for another great recipe, and to my lovely Mum, for sharing it with me when I was growing up. I hope you enjoy this recipe with a fancy italian name, that is nothing fancy to make!
Ingredients:

2 tablespoons oil
2 cloves minced garlic (I substituted garlic powder)
1 cup diced onion (I omitted this, but you can substitute with onion powder)
1 pound ground beef
1 28oz can of diced tomatoes
1 28oz can of red kidney beans (I couldn't find a 28oz, so I used 2 19oz... great choice!)
1 6oz can of tomato paste
1 tsp oregano
3 tbl chili powder
1/4 tsp pepper
1 bay leaf
1 tsp crushed red peppers

In a large pot, sauté onions and garlic in oil until soft. If you're going to use powdered onions or garlic, save the spices for later and skip on to the next step. Add ground beef to pot and brown it over medium heat. Turn heat down to low and add remaining ingredients. Gradually bring up to medium heat and let simmer for 30-60 minutes. Stir it frequently as it will stick to the bottom of the pot. Make sure to remove the bay leaf before serving, as it will remain quite sharp. If you're the slow-cooker type, sauté our onions and garlic and then brown your meat. Add these and all other ingredients to your slow cooker and cook on low heat all day.

This is very delicious fresh or re-heated in the microwave. I also like to serve it up with a few hunks of home-made white bread (see previous recipe).


Enjoy your cooking!

Thursday, July 1, 2010

Home-made White Bread

For those of us with kids, sandwiches seem to be an every day meal. Not that bread from the store is so expensive, but for what you get I think that home-made bread is worth it. It's hearty, tasty, and gives you the satisfaction of knowing exactly what went into it. No preservatives, no nothing.

This recipe is a family favourite, and when I say that I mean it's a family favourite for generations. As far as I know, it's from my Grammie. I remember watching her make bread every summer and finding it fascinating. My mother and oldest brother really took it on too. At least once a month someone was making it fresh in our house. As for me, I make it at least once a week, because when you're feeding two toddlers and two adults, you go through a LOT of bread. You wouldn't believe how much better even a jam sandwich tastes on thick slabs of white bread.

I should also mention I don't have a fancy (or even not fancy) stand mixer. I use a big bowl, a wooden spoon and my bare hands. Now, my mother has said more than once she couldn't live without her stand mixer, and I totally get that. As for me, I don't have one, and I don't know how I'd live with it. There's something about doing it all with your bare hands that makes you appreciate the food even more.

So, here's the recipe:

3 tablespoons of sugar
1 1/3 tablespoons salt
1/2 cup butter of margarine

Set these ingredients in your largest mixing bowl and scald with 4 cups of boiling water. Allow this mixture to cool to lukewarm. To help the process along (if you're short on time like me) stir constantly with a wooden spoon.

When you can tell it's cooling enough, take another smaller bowl and combine

2 tablespoons of quick-rise yeast
2 teaspoons of sugar
1 cup of lukewarm water

Let this mixture stand for 10 minutes. It will get nice and frothy. After 10 minutes, add to large mixture and stir in for a few seconds. Now's the time to add your flour. My recipe says it will take 11 cups of flour, but I often find it will take 12. I usually start with the 11 and keep a full cup set aside to add as needed (or should I say kneaded? Hah, Mom humour). Because I'm mixing it by hand, I try to add the flour a few cups at a time, stirring until it's completely mixed it, then proceed adding more. At some point, your bowl may not be big enough for all that flour, so turn it out onto a floured surface (I just use my counter) and let the rest of your flour mix in while you knead it. For those of you who wear rings, I'd recommend (if you're comfortable with it), that you take off any rings with gems or diamonds on them as they will catch in the dough and leave your ring looking like a mess. I leave on my wedding band and take off my engagement ring. As a side note, this always reminds me doubly of my Grammie, because it was her engagement ring. My parents gave it to my husband so he could propose and I'm so happy to wear it as a constant reminder of how loved I am by those present and gone.
You'll want to knead your dough until it's smooth and elastic. Make sure to add enough flour to keep it from being sticky but not tough. That will make it nice and soft. I try to add any extra flour in handful and knead it in gradually rather than adding whole cups of flour after the first 11 cups.

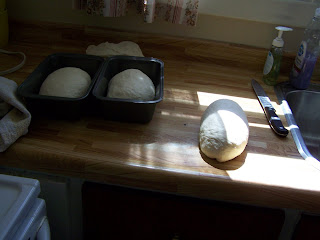
Next, put your big ball of dough into a large bowl (I wash my bowl and plop it back in there) and let it rise to double, covered with a clean, dry towel. In my bowl this part looks pretty comical as it inevitably rises over the edge and mushrooms out. This doesn't change the taste of the bread, so don't worry if you're in the same situation.

Here's the fun part. My Mum always calls this part one of her favourite forms of stress relief. Punch down that big ball of dough. I mean it. Not just once, but as many times as you need to so you can get those air bubble outs. After punching it down a few times I usually turn it out onto a clean surface and continue to pound it until it's flat. After that's done, cut it into four equal pieces and knead it a little while you form it into the shape of a loaf. Plop it into a lightly greased bread pan. Let all four loaves sit in the pans and rise to double again. Once they're all ready, pop them into a 375 degree oven for 35-40 minutes. After they're baked take them right out of the pans and let them cool on wire racks.

If you like your bread to stay soft, I suggest bagging them while they're still warm. They freeze very well, so stuff them into cleaned out bread bags (I like the wonderplus ones because they're roomy enough for these bigger loaves) and pop a few in the freezer if you like. If you want to have a piece while it's hot and fresh, be aware that it will be hard to cut because the inside is so light and fluffy when it's warm. I also recommend you don't toast this bread. Not that it doesn't taste amazing, but I promise you it's a million times better heated up for about 20 seconds in the microwave.

Enjoy your baking!

An Introduction of Sorts

First of all a little about me. Some would consider me a newlywed with almost 4 years of marriage under my belt, but I'm also a new Mom. I have (so far) three beautiful babies. My oldest, a little girl, will be three in September. My second is a boy, and he's 16 months. My youngest is just two months old, and he's also a little boy. We live a truly blessed life full of diapers, potties, peanut butter kisses, time outs, of course, lots of love. We may not be perfect, but we're us. I remember when we were at the hospital for the delivery of our third, our very wise nurse told me that there are no perfect deliveries, only perfect babies. I feel like we've been lucky thrice over with our children. Enough bragging though, or you'll get too bored.

Now, for the concept of this blog. With the birth of our third, I became acutely aware of the fact that I now have a family the same size as my parents and maternal grandparents had. Now, my memories of my family close and extended are not perfect, but I have my fair share of beautiful memories down in the country with my mother's family. Most of those revolved around the kitchen with my Mum and my Grammie. There were many successes, and a few disasters that are still notorious today. Let's just say my Grammie wasn't the best cook, but what she did know she did very well. Her cookbooks are full of food that I consider even today to be comfort food.

Let it be said though, while my Grammie was a passable cook, she was an excellent baker. I can't remember a recipe that she couldn't make to perfection. Every church bake sale table at her small community church was full of her pies, cookies and squares. Now, she passed on this amazing skill to my mother, and I'd like to think to me too. It took me two kids to really try baking on my own (it was usually a social activity when I was a kid). I'm not going to say I've mastered the art of baking, but I have a few staple baked goods I can whip up with ease.

My plan over the next little while is to share my favourite recipes, and maybe some memories too. I hope you'll follow me along this journey to rediscover my Grammie through the dusty pages of her old cookbooks and share her with you. As we add recipes, I hope you'll come to love her as I do.